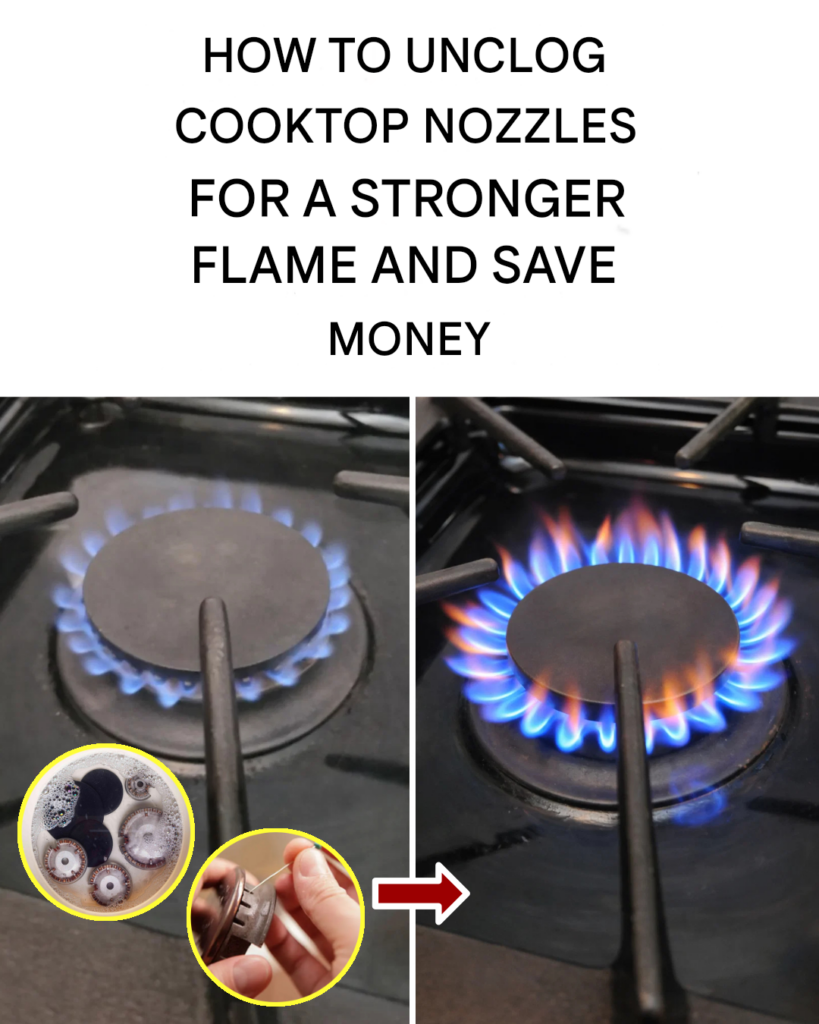

Step 5: Clean Around the Igniter
ADVERTISEMENT
The igniter is usually a small ceramic component near the burner.
Clean it gently with a soft, damp cloth. Do not bend, strike, or scrape it because ceramic igniters can crack.
ADVERTISEMENT
Allow it to dry fully before testing the burner.
Step 6: Reassemble the Burner Correctly
Return the burner head to its original position, then place the matching cap on top.
The head and cap should sit flat and level. A cap that is tilted or placed on the wrong burner can cause:
- Uneven flames
- Delayed ignition
- Repeated clicking
- Flames appearing on only one side
- A burner that will not light
Check the manual’s alignment marks or pins if your stove has them.
Step 7: Test the Flame
After everything is completely dry and correctly assembled, test one burner at a time.
A properly operating burner should ignite promptly and produce a steady, even flame around the burner head.
Flame appearance can vary depending on the appliance and whether it uses natural gas or propane. Small yellow tips may be normal on some propane appliances, but persistent large yellow flames, flames lifting away from the burner, popping, or delayed ignition should be inspected by a qualified technician.
Turn the burner off immediately if you smell gas.
When Cleaning Is Not Enough
Call a qualified appliance technician if:
- The burner remains weak after cleaning
- The flame is unusually large or yellow
- Ignition is delayed
- The burner repeatedly clicks while lit
- Only part of the burner ignites
- The cap or burner head is damaged
- You suspect a blocked or damaged gas orifice
- The problem affects several burners
- You smell gas at any time
These symptoms may involve gas pressure, ignition components, regulators, valves, or incorrect burner parts rather than ordinary food buildup.
Common Mistakes to Avoid
See more on the next page to continue reading →
ADVERTISEMENT